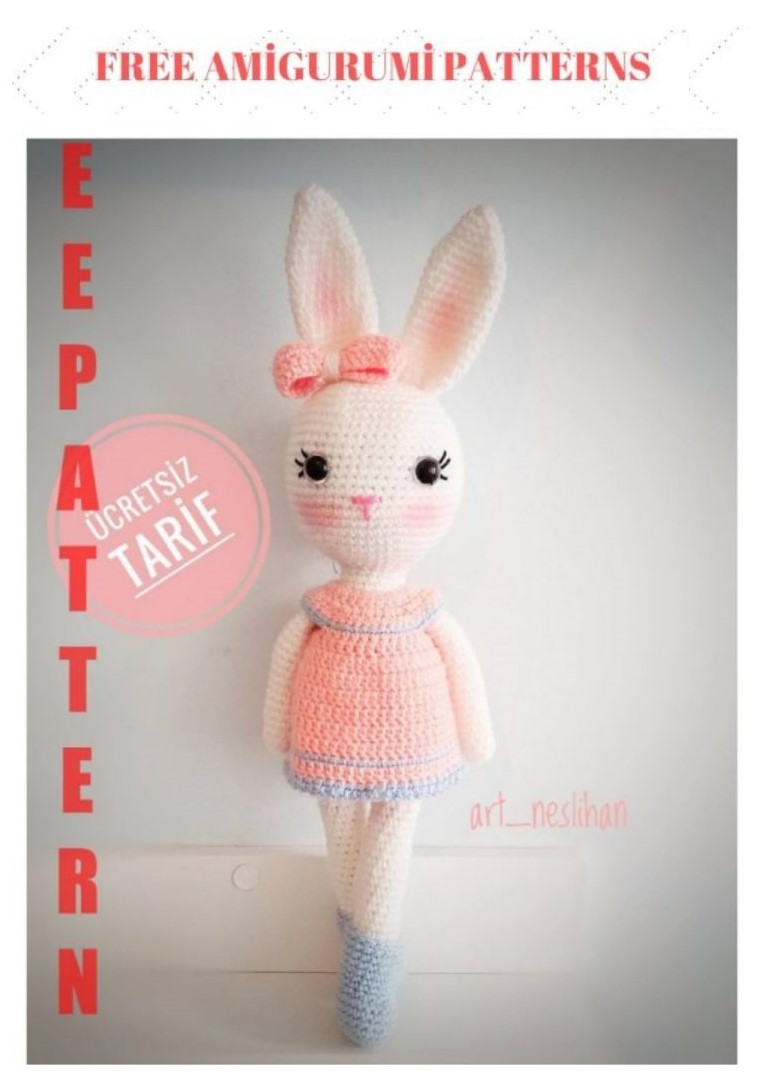
Rowdy Bunny Amigurumi Free Crochet Pattern
Pinterest Offical Page : Amigurumfree.msa.plus
Facebook Group: Amigurumi Free Patterns
Facebook Offical Page: Amigurumfree.msa.plus
If you decide to knit amigurumi today, do not forget to look at this recipe. In this article, amigurumi rowdy bunny free crochet pattern is waiting for you.
Trailer
Tools:
1.5mm crochet hook (or whatever size you prefer that works best with your yarn)
Small pliers
Scissors
long sewing needle
Materials:
“Detskaya Novinka” yarn as the main color, the “bisernaya” yarn for the team (can be used
any thread) Filling
Copper wire, 1 mm, for joints and skeleton
One large and 5 medium-sized buttons (4 of them identical, for joints) Buttons or
snap buttons for shorts
Eyes (10-15mm or larger if you are using thicker yarn – the rabbit is going to be bigger)
small stones or coins for weight
Strong, non-elastic sewing thread for joints


Abbreviations:
St = stitches
ch = chain
sc = single crochet
HDC = half double crochet
BLO = Back Loop
inc = increase: crochet 2 stitches at next stitch
Dec = crochet decrease the next 2 stitches together create a stitch
Rnd = round
sl st = slip stitch
PATTERN

Arms.
2. Do the work in a spiral, not join the rounds.
1. 6 sc in a magic ring (or ch 2, 6 sc in 2 North Dakota hook chain)
2. inc 6 (12)
3-6. 12 sc
7. Dec 2, 3sc, inc 2, 3sc (which is the curve of the hand, when set, the drops should be towards up)
8. 12SC
9. 6SC, inc, 5SC. (13)
10. 13sc
11. 6SC, inc, 6SC. (14)
12. 14SC
13. 7SC, inc, 6SC. (fifteen)
14-15. 15SC
16. INC2, 3sc, dec3, 3sc, inc (elbow that forms, when connecting the decreases they should be towards
down)
17. 15SC
18. 1sc, inc, 13sc (sixteen)
19-26. 16SC
Insert the wire, bend the arm at the elbow and wrist.
Use the wire 1 mm thick. In the image below the small loop is for the wrist, the
great loop is for the shoulder. When sewing the arm, the needle should go through the large loop.
Bend the wire and wrap with the filler (polyester filler works best), wrap with thread
As shown in the picture. It is better to sew the filling of the loops, so that it is not
slide when the cable is inserted into the arm. Make sure you use two identical pieces of
filled polyester, so the arms are the same size. Photo 1: wire shell of
shell wrapped in polyester padding and thread. Photo 2: Crochet arm, housing and arm
finished.
27. (dec, 2 sc) repeat until end of row.
28. dec, at the end of the row, sew the end zipper, knit in tail.
Leg. (2.pcs)
7 ch.
Rnd 1. Sc on 2 hook North Dakota cad, 5SC, 3sc on last chain (circle one half left). Follow
working around the string – 6SC, 2sc on the last string. (17)
Rnd 2. 6SC, inc3, 6SC, inc 2. (the end with 3 increases will be the toe) (22)
Rnd3. 7SC, (inc, sc, inc, sc, inc,), 7SC, (inc, sc, inc). (27)
Rnd4. 8sc, (inc, 2SC, inc, 2SC, inc), 8sc, (inc, sc, inc), sc (32)
Rnd5. 9sc, (inc, 3sc, inc, 3sc, inc), 14SC (35)
We made the only one
6. rnd – BLO, Only this row. (35)
The sole is ready. Cut cardboard or plastic insert the size of the sole.
Rnd 7-10. 35 sc.
Mark the heel middle and toe with stitch markers or pieces of thread scrap. Rnd 8. Continue
working the rounds. 8 sts before toe marker. Start decreasing: dec, sc, dec, sc,
DEC, (marker stitches), dec, sc, dec, sc, dec, and sc to end of row. (29)
9. RND 29 sc.
Fold the sole along the initial chain (1st row), middle toe and heel mark.
Rnd 10. Second row of decreases:
8 sts before marker toe start: dec, sc, december, sc,december,(marker stitches) dec, sc, dec, sc, dec, and sc to the end of the row. (23)
Place the insert on the foot.
Rnd 11. Third row of the
decreases:
Dec In the middle of the toe, DEC 2 in the middle of the heel (20)
Rnd 12-14. SC20
Place the coins or stones for the weight on the foot (you can tape coins together), stick the foot in.
In the photo below: Leg finished, the foot of the other leg and insert for the foot.
Keep doing the leg, adding as the filling progresses:
Rnd15. Inc, 9 sc, inc, 9 sc (22) Rnd16. Inc, 10 sc, inc, 10 sc (24) Rnd17.
Inc, 11 sc, inc, 11 sc (26) Rnd 18-20. sc 26
Rnd 21. (dec, 2SC,) x6, 2SC (20)
Rnd22. Dec, until you have 4-6 sts left, sew end zipper, knit in tail.
Body.
Crochet into a spiral without lifting chains, things as you go, tight, but don’t warp the
shape.
1. 6SC in a magic loop
2. Inc 6 (12)
3. (Sc, inc) x6 (18)
4. (2SC, inc) x6 (24)
5. (3sc, inc) x6 (30)
6. (4SC, inc) x6 (36)
7. (5SC, inc) x6 (42)
8. 42sc
9. (6SC, inc) x6 (48)
10-14. 48SC
15. (dec, sc) x5, dec, 31sc (42)
16. 42sc
17. (dec, sc) x4, 30SC (38)
18-24. 38sc
25. 8sc, (dec, 4SC) x4, dec, 4SC (33)
26-31. 33sc
32. (dec, 9sc) x3 (30)
33-36. 30SC
37. (dec, 3sc) x6 (24)
Matter, insert the bottom of a button joint. joint
button is made with 2 buttons and wire.
You will have a button (2-3 cm) with holes, and about 5 cm of wire. Bend the wire into a
U and inserted into button holes. Photo 1.
Insert the button into the body, wire should be outside, then decrease, working around
of the wire, close the gap. Photo 2. Leave 6-7 stitches. Cut yarn, knit in the end.
Head.
Crochet into a spiral, do not join rounds, things as you go, tight, but do not deform the
shape.
1. 6 ch in a circle (6 ch, sl st on the 1st string). This is the opening for the
joint, which connects the head to the body.
2. Inc 6 (12)
3. (Sc, inc) x6 (18)
4. (2SC, inc) x6 (24)
5. (3sc, inc) x6 (30)
6. (4SC, inc) x6 (36)
7. (5SC, inc) x6 (42)
8. (6SC, inc) x6 (48)
9. (7SC, inc) x6 (54)
10. (8sc, inc) x6 (60)
11. (9sc, inc) x6 (66)
In Rnd 12 we are moving increases, so the head is rounder:
12. 5SC, inc, (10SC, inc) x5, 5SC (72)
13-17. 72sc
On the next rnd, mark the stitch between 4 On the next rnd, mark the stitch between 4 On the next rnd, mark the stitch between 4 On the next rnd, mark the stitch between 4 On the next rnd, mark the stitch between 4 On the next rnd, mark the stitch between 4th and 5th decreases, and between 8 it decreases, and between 8 it decreases, and between 8 it decreases, and between 8 it decreases, and between 8 it decreases, and between 8th
and 9th decreases.
18. (dec, sc) x6, 3sc, (dec, sc) x6, 33sc (60)
19-20. 60sc
When the safety eyes have rather thick stems, we will make two openings for them at Rnd 21.
21 5SC, 4 ch, sc at 9th st of Rnd 20. Marker must be exactly below the mean of its opening. Yes
not, move the beginning of the row so that it is. Make the other opening above the second
marker. If the opening is too large for your mother’s eye, make it smaller, by using
less chains. There should be no 6-8 sts between the eyes once it is put on.
Head-to-body placement:
Take the body, with the thread protruding, pull both ends of the cable through the opening in the
head (chain 6 we start with), and through the holes in the button that are placed inside the
head (It is better to use a bigger button here, so that the head does not tilt to one side).
Twist the ends of the wire together, making sure the head can be activated with a little
force.
Half head stuff.
If you use safety eyes, insert them now. If the eyes are from a sewing loop,
attach them to the finished head. 22-23. 60sc
24. (dec, 8sc) x6 (54)
25-27. 54sc
28. (dec, 7SC) x6 (48)
29-30. 48 SC
31. (dec, 4SC) x8 (40)
32-33. 40ºC
34. (dec, 3sc) x8 (32)
35. (dec, 2SC) x8 (24)
36. 24sc
Add more filling.
37. (dec, 1SC) x8
38. Decrease until you have 6-8 sts left, cut the thread, sew the opening, knit at the end.
If you have eyes with a loop, attach them. That you will do contractions at the same time.
It will have 4 strands of thread 30 cm each, and a long needle. Fold each strand in half and
attach to the loop. Two strands in each eye.
One strand will go up, one down.
Threading the needle through one end, insert your needle through the eye opening,
pop the needle down near the edge of the button on your head. Pull the thread and leave it. Do
same with the other end, come out of your needle with the thread first away from the first. Pull
both ends, making a cheek, a knot, hide it inside the head and knit in the
extremes.
Important: We are using lower ends of each strand, the loop goes horizontally.
Now we have 2 left ends. They go into the eye opening and out on the opposite side of the
head, near the neck. Pull both ends and a knot. Don’t pull too much, or your rabbit will be watching
upwards. Knitted at the ends.
If you have safety eyes.
No contractions now, using thread (thread) and needle: pull the thread from the two corners of the
eye for the neck, making cheeks (photo below). do that
before I glued the lashes though, I had to re-take the image, that’s why my bunny has
tabs.
If you are doing contractions (sculpture) of the needle for the first time, here is how:
You will need a long needle and thread (thread). It can be acrylic, if you are using it to make the
rabbit. Making right cheek.
Threading the needle (you will need about 30 cm of thread), tie a knot at one end.
Place the thread to the front of the head near the button edge, hiding the knot inside the
head.
Insert the needle with the thread in the directions shown in the photo below: first from the neck
up to the inner corner of the eye. Pull until you get a plump cheek. Hold the cheek with the
fingers, and sew in the opposite direction, skipping a stitch. Pull more and secure with a knot.
Do not cut final. Skip 2-3 stitches to the left (hiding the thread inside the head),
fix the thread with a knot. Insert the needle and exit through the outer corner of the eye. Pull up
thread, sew in the opposite direction, skip a stitch. Secure with a knot. Repeat for each other
eye.
Ear. Do 2.
1. 6SC in a magic ring
2. inc 6 (12)
3. (sc, inc) x6 (18)
4. 18 sc
5. (2SC, inc) x6 (24)
6. 24sc
7. (3sc, inc) x6 (30)
8. 30SC
9. (4SC, inc) x6 (36)
10. 36sc
Place markers on 1st and 19th sts, on rows 11-30 decrease above markers on each odd row:
11. dec, 16SC, dec, 16SC
12. 34sc
13. dec, 15SC, dec, 15SC
14. 32sc
15. dec, 14SC, dec, 14SC
16. 30SC
17. dec, 13sc, dec, 13dec
18. 28sc
sixteen
19. dec, 12SC, dec, 12SC
20. 26SC
21. dec, 11sc, dec, 11sc
22. 24sc
23. dec, 10SC, dec, 10SC
24. 22sc
25. dec, 9sc, dec, 19sc
26. 20SC
27. dec, 8sc, dec, 28р 8sc.
18sc
29. dec, 7SC, dec, 7SC
30-42. 16SC
Cut the thread, leaving the long tail to sew.
Face
Sew the ears to the head, 1-2 rows above the eyes.
You can use a plastic nose or embroider with pink thread or thread.
Glue eye lashes like in the photo below.
You can make eyelids:
1. 8-10 ch. Must be 2 \ 3 eye length: from outer corner to
end of the pupil, otherwise the rabbit will have a somber expression. Correct length
of the chain try it in the eye.
2. Pd, 2sc, 2hdc, 2sc, pd. The exact number of stitches depends on the
length of your chain.
Stick the eyelashes on the eyelid, let dry. Place the eyelids with the eyelashes on the eye, find the
position you like, and tail very carefully. The other, the smaller eyelid, is a 6-8 string. Stick it on
the eye. Use glue that dries fast and clear.
Embroider the mouth, pulling the corners of the nose (see photos below):
Embroider, or draw, the eyebrows.
Tail.
2 ch, 6SC on 2 hook North Dakota ch
1. inc 6 (12)
2. (sc, inc) x6 (18)
3. (2SC, inc) x6 (24)
4-6. 24 SC
7. (dec, 2 sc) x6 (18)
8. dec 6 (12), leave glue to sew
Matter lightly. Sew the tail onto the body (between 7th and 9th rounds).
Positioning the arms and legs to the body:
For this we are going to use the button joints.
You will need a long needle, strong non-elastic thread (DO NOT use the thread), and 4 buttons.
The photo below shows how to determine the fixing points. Make sure your rabbit can sit
comfortably.
Mark the points (marker can be used)
Now you have to pull the thread through: button, arm, body, arm, button. Then go back. Repeat 3-4
times. Secure the thread with a knot, knit at the end. Do the same with the legs.
Cap
Work in a spiral, no rounds join
1. 6SC in a magic ring
2. inc 6 (12)
3. (1sc, inc) x6 (18)
4. (2SC, inc) x6 (24)
5. (3sc, inc) x6 (30)
6. (4SC, inc) x6 (36)
7. (5SC, inc) x6 (42)
8. (6SC, inc) x6 (48)
9. (7SC, inc) x6 (54)
10. (8sc, inc) x6 (60)
11. (9sc, inc) x6 (66)
12. (10SC, inc) x6 (72)
13. (11sc, inc) x6 (78)
14. (12SC, inc) x6 (84)
15. (13sc, inc) x6 (90)
Mark 1 Mark 1 Mark 1 Mark 1 Mark 1 Mark 1 Mark 1 st, 2 North Dakota North Dakota North Dakota North Dakota North Dakota North Dakota North Dakota and 3 rd increases in Rnd15 (green, white pins and blacks in the photo below). increases in Rnd15 (green, black and white pins in the photo below). increases in Rnd15 (green, black and white pins in the photo below). increases in Rnd15 (green, black and white pins in the photo below). increases in Rnd15 (green, black and white pins in the photo below). increases in Rnd15 (green, black and white pins in the photo below). increases in Rnd15 (green, black and white pins in the photo below).
16-21. inc previous bookmarks (3 increases in a row)
22. markers move in this row. 108 sc
23. 108sc
24-29. dec previous bookmarks (3 decreases in a row)
30. 90sc
31. 90sc
32. (13sc, dec) x6 (84)
Test the cap: it should not be too small, or slide down. If necessary, correct the size using the
adding or removing rows with decreases (Rnd24-29).
33. 84sc FLO (front loops only). 34-35.
84sc.
Cut yarn, knit in the end.
Visor is knit in the rounds, like the sole. start with
13 ch
1. sc in 2 North Dakota hook ch, 11sc, 3 sc in last chain loop medium, continue working around
string – 11sc, 3sc on the 1st string
2. (12SC, inc, sc, inc) x2
3. (13sc, inc, sc, inc) x2
4. (14SC, inc, sc, inc) x2
5. (15SC, inc, sc, inc) x2
6. (16SC, inc, sc, inc) x2
7. (17sc, inc, sc, inc) x2
Fold in half along the initial chain, try it on the top – if it looks wide enough
for you to continue working consecutive rounds without increases (4-6 rounds). If you want more width, make two
more rows with increases, then 2-4 rounds without increases.
Next round – ps around the brim.
Do not cut the thread, they continue to give a visor to the surface. (Insert the hook into the visor stitch, to
then on the top of, and crochet together). Finish with a round of sl st along the edge.
Test the lid on your rabbit.
Shorts.
1. 6SC in a magic ring
2. inc 6 (12)
3. (sc, inc) x6 (18)
4. (2SC, inc) x6 (24)
5. (3sc, inc) x6 (30)
This piece should fit between the legs and the tail. If it is too big or too small, correct the
size by adding or removing 1-2 rounds.
6. CH20, skip 5 sc, 10 sc, CH20, skip 5SC, 10 sc.
Make sure the leg openings are large enough. If not, add more strings. 7-10.
60sc
Now we are going to make an opening for the tail.
Fold the shorts in half to find the center of the back. Place a marker. We are going to
work on the row transformation now, leaving 2 sts on each side of the marker (5 sts in total) 11-13. ch, sc 55
14. ch, 55sc, ch 5 above the tail opening. Work in
rounds now. 15-16. 60 sc.
Divide into two parts, the back and front (30sts each), finish separately. Front:
17-20. 30SC
21. 3sc, DEC 12, 3sc
22-24. 18sc. Cut yarn, knit in the end. Repeat for
back.
Test the shorts on your rabbit to make sure they fit. To knit
a row of sc around the leg openings.
straps
Chain of appropriate length.
1. sc in each ch
2. In every th
Repeat for the second strap. Sew them on the pants. Sew on buttons
pressure or buttons. You can also make pockets.
Pocket.
1. Ch 8, sc in 2 North Dakota hook ch, 7SC.
2-6. 7 sc
7. dec, 5SC
8. 4SC, DEC
9. dec, 3sc
10. 2SC, DEC
11. dec, sc
12. December
Leave long tail to sew.
In the photo below: shorts with one pocket, the other pocket and straps.
Dress up your bunny))
You are done making your rabbit!