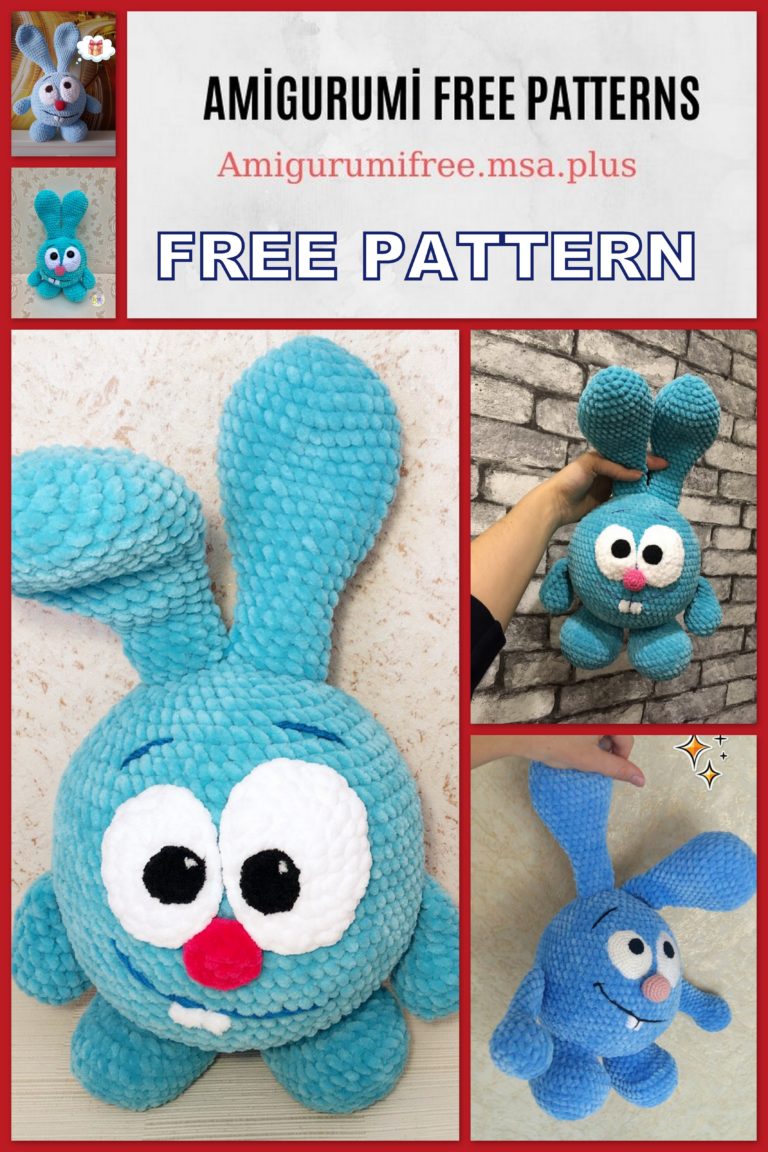
Amigurumi Handsome Cat Free Crochet Pattern
Pinterest Offical Page : Amigurumfree.msa.plus
Facebook Group: Amigurumi Free Patterns
Facebook Offical Page: Amigurumfree.msa.plus
To create the Ofeich Cat, we need:
· Mohair yarn. I have a mohair 50g / 475m in 3 threads
· 1.25 hook or under your yarn
· Yarn for string bag and hook under it. I have Jeans from YarnArt and hook 1.5
· Filler
· Fabric-based wire and patch
· Needle and durable thread for tightenings (we pull off a little bit)
· Needle and thread for sewing
Eyes
Felting needle
White felt or wool for felting eye proteins
Velcro for combing
White acrylic for tinting and black pastel
· A little clay for a nose or a finished nose
· Fishing line for mustache and vibrissa
I began to knit another cat from the same mohair, but in 2 strings, and not in 3.
Hook 1. The cat’s height is about 20cm)
Abbreviations
Ch – air loop
Sc – single crochet
Dec – decrease, knit two stitches together
İnc – increase – we knit two from one column
() х4р – repeat in parentheses 4 times
3in1 – we knit three from one column
Half loop – half loop
Sl-st – connecting column
3vms – 3 stitches knit together
The toy is knitted in a spiral for both half loops, if not specified
otherwise.
The ears. (2 pcs.)
We knit in rotary rows. At the beginning of each row do 1vp lift.
Dial a chain of 15ch, from the second loop from the hook
1-5 Row. 14sc
6 row. 3sc, 1dec, 4sc, 1dec, 3sc (12)
7 row. 12sc
8 row. 5sc, 1dec, 5sc (11)
9 row. 5sc, 1dec, 4sc (10)
10 row. 4sc, 1dec, 4sc (9)
11 Row. 4sc, 1dec, 3sc (8)
12 Row. 3sc, 1dec, 3sc (7)
13 row. 2sc, 3vms, 2sc (5)
14 row. 1dec, 1sc, 1dec (3)
15 row. 3vms (1)
Fasten the thread, break it.
Eyelids (2 pcs.)
Dial a chain of 15ch. We knit in rotary rows from the second loop from the hook.
At the beginning of each row do 1ch lift
1-3 row. 14sc
4 row. (2sc, 1dec) x3p, 2sc (11)
Fasten the thread, break it.
Lower jaw.
We knit in rotary rows. At the beginning of each row we do 1ch lift.
Dial a chain of 12ch, from the second loop from the hook
1 row. 11sc
2 row. 4sc, 1dec, 5sc (10)
3 row. 4sc, 1dec, 4sc (9)
4 row. 3sc, 1dec, 4sc (8)
5 row. 3sc, 1dec, 3sc (7)
6 row. 2sc, 3vms, 2sc (5)
7 row. 1dec, 1sc, 1dec (3)
Fasten the thread, break it.
Tail.
You can not follow the marker. Dial the chain and 2ch. Further from 2 loops from
hook
1 row. 6sc
2 row. 6inc (12)
3 row. (2sc, 1inc) х4р (16)
4 row. 16sc
5 row. (3sc, 1inc) х4р (20)
6-12 Row. 20sc (7 rows)
13 row. 1dec, 18sc (19)
14-19 Row. 19sc (6 rows)
Now we insert the wire and begin to stuff.
20 row. 1dec, 17sc (18)
21-26 Row. 18sc (6 rows)
27 Row. 1dec, 16sc (17)
28-34 Row. 17sc (7 rows)
35 row. 1dec, 15sc (16)
36-41 Row. 16sc (6 rows)
42 row. 1dec, 14sc (15)
43-48 Row. 15sc (6 rows)
49 row. 1dec, 13sc (14)
50-55 Row. 14sc (6 rows)
56 row. 1dec, 12sc (13)
57-62 Row. 13sc (6 rows)
63 row. 1dec, 11sc (12)
64-70 row. 12sc (7 rows)
Finish sl-st. Fasten the thread, break it.
Stage 2.
Pens, 2 things)
Dial a chain of 2ch, from the second loop from the hook. You can not follow the marker.
1 row. 6sc
2 row. 6inc (12)
3 row. (1sc, 1inc) x6r (18)
4-7 Row. 18sc
8 row. 1dec, 16sc (17)
9-11 Row. 17sc
12 Row. 1dec, 15sc (16)
13-16 Row. 16sc
17 Row. 1dec, 14sc (15)
We insert the wire and begin to stuff.
18-32 row. 15sc (15 rows)
33 row. 1dec, 13sc (14)
34-54 Row. 14sc (21 rows)
Finish sl-st, fasten thread, break.
Stage 3. Legs.
Left leg.
The marker runs along the inside of the foot and legs. In case of marker leaving
to the side, do offset loops.
Dial the chain from 7ch, then from the second loop from the hook
1 row. 1inc, 4sc, 3in1, on the other side of the 5sc chain (14)
2 row. 7sc, 1inc, 1sc, 1inc, 2sc, 1inc, 1sc (17)
3 row. 7sc, 1inc, 1sc, 1inc, 7sc (19)
4 row. 8sc, 1inc, 1sc, 1inc, 8sc (21)
5-6 Row. 21sc
7 row. 10sc, 1dec, 9sc (20)
8 row. 9sc, 1dec, 8sc, 1inc (20)
9 row. 9sc, 1dec, then we knit for the back half loop 7sc, for both half loop 2sc (19) then for both
half loop
10 row. 19sc
11 Row. 10sc, then enter the hook into the free half loop of the 9th row, grab both half loop
10 rows and knit sc. So with the capture of the half loop of the 9th row, you need to knit 7sc.
2sc for both half loop (19) Next, we knit for both half loop.
12 Row. 7sc, 1dec, (3sc, 1inc) x2p, 2sc (20)
13 row. 2sc, 1dec, 1sc, 1dec, 4sc, for the rear half loop 7sc, for both half loop 2sc (18)
14 row. 18sc
15 row. 1sc, 2dec, 2sc, 1dec, then we introduce the hook into the free half loop of 13 rows,
grab both half loop of the 14th row, knit sc. So with the capture of half loop 13 rows you need
knit according to the pattern: 1sc, 1inc, 2sc, 1inc, 1sc, 1inc. Further for both half loop of the 14th row
we knit the remaining 2sc (18) Next, we knit for both half loops.
16 row. (3sc, 1dec) x2p, 2sc, 1inc, 2sc, 1dec, 1sc (16)
17 Row. 16sc
18 row. 3sc, 1dec, 5sc, 1inc, 5sc (16)
Insert wire and stuff tightly. Next, fill as you knit. Per
marker can not be followed. Later we will displace and align it.
19-40 Row. 16sc (22 rows)
41 row. Incomplete row. We knit so many sc to set a new marker
in the middle of the back of the leg. Next, follow the marker so that it does not
deviated from the vertical. If necessary, make offset loops.
42 row. 11sc, 1inc, 4sc (17)
43 row. 12sc, 1inc, 4sc (18)
44 row. 3sc, 1inc, 4sc, 1inc, 9sc (20)
45 row. 14sc, 1inc, 5sc (21)
46 row. 21sc
47 row. 14sc, 1inc, 6sc (22)
48 row. 15sc, 1inc, 6sc (23)
49 row. 9sc, (1inc, 6sc) x2p (25)
50 row. 17sc, 1inc, 7sc (26)
51 row. 17sc, 1inc, 8sc (27)
52 row. 18sc, 1inc, 8sc (28)
Finish sl-st. Fasten the thread, break it.
Right leg.
The marker runs along the inside of the foot and legs. In case of marker leaving
to the side, do offset loops.
Dial a chain of 7ch. From the second loop from the hook
1 row. 5sc, 3in1, on the other side of the chain 4sc, 1inc (14)
2 row. 1sc, 1inc, 2sc, 1inc, 1sc, 1inc, 7sc (17)
3 row. 7sc, 1inc, 1sc, 1inc, 7sc (19)
4 row. 8sc, 1inc, 1sc. 1inc, 8sc (21)
5-6 Row. 21sc
7 row. 9sc, 1dec, 10sc (20)
8 row. 1inc, 8sc, 1dec, 9sc (20)
9 row. 2sc, for the rear half loop 7sc, then for both half loop 1dec, 9sc (19)
10 row. 19sc
11 Row. 2sc, then enter the hook into the free half loop of the 9th row, grab both half loop
10 rows and knit sc. So with the capture of the half loop of the 9th row, you need to knit 7sc.
10sc for both half loop (19) Next, we knit for both half loop.
12 Row. 2sc, (1inc, 3sc) x2p, 1dec, 7sc (20)
13 row. 2sc, for the rear half loop 7sc, then for both half loop 4sc, 1dec, 1sc, 1dec, 2sc (18)
14 row. 18sc
15 row. 2sc, then enter the hook into the free half loop of the 13th row, grab both
half loop of the 14th row, we knit sc. So with the capture of half loop 13 rows you need to knit
circuit: 1inc, 1sc, 1inc, 2sc, 1inc, 1sc. Next, for both half loops of the 14th row, we knit 1dec,
2sc, 2dec, 1sc (18)
16 row. 1sc, 1dec, 2sc, 1inc, 2sc, (1dec, 3sc) x2p (16)
17 Row. 16sc
18 row. 5sc, 1inc, 5sc, 1dec, 3sc (16)
Insert wire and stuff tightly. Next, fill as you knit. Per
marker can not be followed. Later we will displace and align it.
19-40 Row. 16sc (22 rows)
41 row. Incomplete row. We knit so many sc to set a new one
marker in the middle of the back of the leg. Next, follow the marker so that it does not
deviated from the vertical. If necessary, make offset loops.
42 row. 4sc, 1inc, 11sc (17)
43 row. 4sc, 1inc, 12sc (18)
44 row. 9sc, 1inc, 4sc, 1inc, 3sc (20)
45 row. 5sc, 1inc, 14sc (21)
46 row. 21sc
47 row. 6sc, 1inc, 14sc (22)
48 row. 6sc, 1inc, 15sc (23)
49 row. (6sc, 1inc) x2p, 9sc (25)
50 row. 7sc, 1inc, 17sc (26)
51 row. 8sc, 1inc, 17sc (27)
52 row. 8sc, 1inc, 18sc (28)
Do not break the thread. From here we continue knitting carcasses.
Stage 4. Carcass.
We continue knitting on the right leg.
1 row. 9sc (check if the marker did not run away, then there should be the most
protruding point of the foot), 6ch, 28sc along the left foot (starting from the very
protruding point), 6sc along the chain of ch, 19sc along the right leg (68)
2 row. Incomplete row. 9sc on the right foot, 3sc on the chain of ch.
We expose the new brand Row. Now he goes to the center of the back.
3 row. 17sc, 1inc, 32sc, 1inc, 17sc (70)
4 row. 2sc, 1inc, (3sc, 1inc) х4р, (2sc, 1inc) х4р, 8sc, (1inc, 2sc) х4р,
(1inc, 3sc) x4p, 1inc, 2sc (88)
5 row. 6sc, 1inc, 11sc, 1inc, 12sc, 1inc, 24sc, 1inc, 12sc, 1inc, 11sc, 1inc,
6sc (94)
6 row. 1dec, 1inc, 88sc, 1inc, 1dec (94)
7 row. 1dec, 1inc, 88sc, 1inc, 1dec (94)
8 row. 1dec, 90sc, 1dec (92)
9 row. 1dec, 22sc, 1dec, 7sc, 1dec, 22sc, 1dec, 7sc, 1dec, 22sc, 1dec (86)
10 row. 86sc
11 Row. 1dec, 82sc, 1dec (84)
12 Row. 41sc, 1dec, 39sc, 3vms (82) Take the third loop to decrease
next row. Thus, the marker will shift 1 loop to the left.
13 row. 3sc along with 3sc tail, 76sc, 3sc along with 3sc tail
(82)
14 row. 19sc, 1dec, 40sc, 1dec, 16sc, 3sc tail (80)
Move the marker here, now it goes to the center of the tail and goes
to the back.
15 row. 3sc tail, 6sc, (1dec, 18sc) x3p, 1dec, 9sc (76)
16 row. 76sc
17 Row. 2sc, 1dec, 16sc, 1dec, 32sc, 1dec, 16sc, 1dec, 2sc (72)
18 row. 8sc, 1dec, 52sc, 1dec, 8sc (70)
19 row. 70sc
20 row. 10sc, 1dec, 46sc, 1dec, 10sc (68)
21-23 Row. 68sc
24 row. 13sc, 1dec, 38sc, 1dec, 13sc (66)
25 row. 5sc, 1dec, 15sc, 1dec, 18sc, 1dec, 15sc, 1dec, 5sc (62)
26 Row. 62sc
27 Row. 17sc, 1dec, 6sc, 1dec, 8sc, 1dec, 6sc, 1dec, 17sc (58)
28 Row. 24sc, 1dec, 6sc, 1dec, 24sc (56)
29-33 Row. 56sc (5 rows)
34 row. 20sc, 1dec, 12sc, 1dec, 20sc (54)
35-44 Row. 54sc (10 rows)
45 row. 11sc, 1dec, 28sc, 1dec, 11sc (52)
46 row. 52sc
47 row. 6sc, 1dec, 36sc, 1dec, 6sc (50)
48-49 Row. 50sc
50 row. 10sc, 6sc together with 6sc hands, 18sc, 6sc together with 6sc hands,
10sc (50)
51 row. 10sc, 8sc on the arm, 18sc, 8sc on the arm, 10sc (54)
52 row. 15sc, 1dec, 20sc, 1dec, 15sc (52)
53 row. 6sc, 1dec, 2sc, 1dec, 6sc, 1dec, 12sc, 1dec, 6sc, 1dec, 2sc, 1dec,
6sc (46)
54 row. 46sc
55 row. 3sc, 1dec, 10sc, 1dec, 12sc, 1dec, 10sc, 1dec, 3sc (42)
56 row. 6sc, (1dec, 5sc) x4p, 1dec, 6sc (37)
57 Row. (3sc, 1dec) х3р, 7sc, (1dec, 3sc) х3р (31)
58 row. (2sc, 1dec) х3р, (1sc, 1dec) х2р, 1sc, (1dec, 2sc) х3р (23)
59 row. 23sc
60 row. 10sc, 1dec, 11sc (22)
61 row. 22sc
Do not break the thread, continue knitting the head.
Stage 5. Head.
We continue knitting. The marker is on the back of the head.
1 row. 22sc
2 row. (1sc, 1inc) х11р (33)
3 row. 16sc, 1inc, 16sc (34)
4 row. (2sc, 1inc) х3р, (1sc, 1inc) х4р, (1inc, 1sc) х4р, (1inc, 2sc) х3р (48)
5 row. 48sc
6 row. (3sc, 1inc) х3р, (2sc, 1inc) х4р, (1inc, 2sc) х4р, (1inc, 3sc) х3р (62)
7 row. 8sc, 1inc, (5sc, 1inc) х3р, 8sc, (1inc, 5sc) х3р, 1inc, 8sc (70)
8 row. 70sc
9 row. (6sc, 1inc) х10р (80)
10 row. (9sc, 1inc) x8r (88)
11-16 Row. 88sc
If the marker escaped, align it now. In case of displacement loops
have to do often, now it’s better to make an additional loop
displacement.
17 Row. 38sc, 1inc, 1dec, 6sc, 1dec, 1inc, 38sc (88)
18 row. 39sc, 1dec, 6sc, 1dec, 39sc (86)
19 row. 37sc, 1inc, 1dec, 6sc, 1dec, 1inc, 37sc (86)
20 row. 37sc, 1inc, 1dec, 6sc, 1dec, 1inc, 37sc (86)
21 row. 38sc, extra marker, 1dec, 6sc, 1dec, extra marker,
38sc (84)
22 row. 36sc, 1inc, 1dec, 6sc, 1dec, 1inc, 36sc (84)
23 row. 36sc, 1inc, 1dec, 6sc, 1dec, 1inc, 36sc (84)
24 row. 5sc, 1dec, (9sc, 1dec) х3р, 4sc, (1dec, 9sc) х3р, 1dec, 5sc (76)
25 row. 34sc, 1dec, 4sc, 1dec, 34sc (74)
26 Row. 32sc, 1inc, 1dec, 4sc, 1dec, 1inc, 32sc (74)
27 Row. 6sc, 1dec, 8sc, 1dec, 6sc, 1dec, 7sc, 1dec, 4sc, 1dec, 7sc, 1dec, 6sc, 1dec, 8sc,
1dec, 6sc (66)
28 Row. 29sc, 1dec, 4sc, 1dec, 29sc (64)
29 Row. (6sc, 1dec) x8r (56)
30 row. 56sc
We start to fill, trying to keep in shape. See the photo. We are a little
we will tighten, while maintaining these bends.
31 row. (5sc, 1dec) x8r (48)
32 row. (6sc, 1dec) х6р (42)
33 row. (5sc, 1dec) x6r (36)
34 row. (4sc, 1dec) х6р (30)
35 row. (3sc, 1dec) х6р (24)
36 row. (2sc, 1dec) x6r (18)
37 Row. (1sc, 1dec) x6r (12)
38 row. 6dec (6)
Pull the hole. Fasten the thread, break it.
Stage 6. Design.
First you need to comb the cat well and all the details.
Now make the ducks. We introduce a needle with a strong thread under the jaw, including
the place where we had a “bulge”. We display about 1 marker. Enter in pair
loops from the exit point of the thread and display about 2 markers. Retreating a couple
loops and return the needle to point 1. Having retreated a couple of loops, we return under
jaw. Tighten the thread so that the nose forms, tighten the knot, thread
cut off.
Repeat the same procedure for the second eye. Insert the needle under the jaw
output at point 2. Enter a pair of loops from the exit point of the thread and output to
point 1. Return the needle to point 2 and then under the jaw. Fasten the thread,
hide the tips.
Sew the lower jaw and ears.
Fasten the eyes and roll the white of the eyes. You can use white felt
instead of felting.
Now we’ll emphasize the muzzle line a bit, go through the felting needle
lines from the corner of the mouth. I also walked a little along the line from nose to mouth and
toned this line with a black marker. But you can simply flash this line
black thread.
Sew the eyelids so as to cover the eye almost halfway.
Sculpt the nose (or use the finished one), fasten.
Now toning. We collect some paint on the brush, the brush should remain
semi-dry. We tint the tips of the ears, breast, strip from the nose bridge upwards
forehead. Slightly tinted line from the eye to the line of the mouth. Black pastel
toned around the nose.
We fix the mustache.
To do this, cut pieces of fishing line 3 times longer than the planned length of the mustache.
Fold in half and tie a knot. We take a needle and thread with a strong thread.
The color is as close as possible to the main color. Thread in one addition. We introduce
a needle in a mouth and we deduce on the right on a muzzle.
Now we enter the needle with the BACK, blunt side through one loop from the point
exit the thread and display on the left on the face in the place where we plan the antennae.
The needle is not pulled out, leave in the muzzle.
And pull the thread from the needle. We pass the thread through the knot on the fishing line and insert
thread back into the needle. We pull out the needle on the right side of the muzzle, holding out
fishing line inside the muzzle.
In the same way we stretch the second antennae. Having finished with him, we take the needle into his mouth,
we tie the thread and hide the ends.
Repeat for the right side of the face.
For vibrissa we introduce a needle the BACK of the mouth from the mouth to the point where we plan
vibrissa. Do not pull the needle to the end. Pull the thread from the needle, thread
through the loop on the fishing line, we thread the thread back into the needle. Pull the needle out
mouth. Tie the ends of the thread with a knot, hide. Repeat from the second side.
String bag.
We knit a chain of 7ch.
We estimate the size of the string bag and take the thread 5 times longer. I have a string bag (myself
mesh) 7cm. So I need a 35cm long thread. Cut off 8 pieces
35cm long.
Fold the thread in half, pull through the outer loop of our pigtail,
we fix. Repeat 4 fasteners on each side of the pigtail – through one
a loop.
The result is such a design. 8 bundles of 2 threads each.
Now we need to pick up 2 templates, according to which we will measure the size of the cell
string bags. The main size is bigger, I have a thick Row brand. Second template in 2-
3 times smaller in diameter – I have a pen from the brush.
Now play the spider and weave the net. We take 2 threads from neighboring bunches,
set a smaller template and tie it to 2 knots. Repeat with
following bundles. The first row has turned out.
We no longer need this template, then we work with a large one.
The second row is tied around a large template, taking threads from neighboring bundles.
We no longer need this template, then we work with a large one.
The second row is tied around a large template, taking threads from neighboring bundles.
Repeat to the desired height. The last row is done without templates, “on
eye”. We knit so that we get a triangle, without tightening it at all
to end.
So we narrow the edge of the string bag a little.
Next, you need to tie the edge with crochets. I got 3sc by
each side of the “triangle”. Those. it turned out 24sc (8 triangles in
3sc).
Now a little math. Divide the resulting number of columns by 2 (2
side of the bag). I got 12sc on each side. Now need
divide each side into 3 parts – the middle part – the place of knotting.
I got 4sc from each side to the handle, 4sc of the handle, 4sc after
pens.
Fold the string bag in half, knit the incomplete row to the bend point, then knit
according to 4sc, 20ch, skip 4 loops and then knit 4sc. That’s how we
make one side of the string bag. We continue the second side. 4sc, 20ch,
skip 4 loops, then 4sc.
Fill string bag to taste))
Hat.
Thanks to Natasha @ DREAM-M for the description)
Bobbin yarn “Velor” (Italy), hook No. 1.25 Hat height 3 cm.
You can not follow the marker.
1 row. 6sc to KA
2 row. 6 inc = 12 (12)
3 row. (1sc, inc) * 6 = 18 (18)
4 row. (2sc, inc) * 6 = 24 (24)
5 row. (3sc, inc) * 6 = 30 (30)
6 row. 2sc, inc, (4sc, inc) * 5.2sc = 36 (36)
7 row. We knit this row for the back half-loops (3sc, dec) * 6 = 30 (30)
8-9 Row. 30sc (30)
10 row. (8sc, dec) * 3 = 27 (27)
11-13 Row. 27sc (27)
14 row. (7sc, dec) * 3 = 24 (24)
15-18 Row. 24 sc (24)
19 row. (7sc, inc) * 3 = 27 (27)
20 row. We knit this row for the front half-loops (inc, 1sc) * 9 = 45 (45)
21 row. (inc, 4sc) * 9 = 54 (54)
22 row. (inc, 8sc) * 6 = 60 (60)
23 row. (inc, 9 sc) * 6 = 66 (66)
The edge of the cap is tied with a “crib step”.
Butterfly
1p dial a chain of 11ch, from the second loop from the hook. Knit rotary
in rows, doing p. lifting.
1-5 p 10 sc
Tie around the perimeter with a “crib step”.
I connected the jumper (the center of the bow) like this: I dialed a chain of 7ch. Then pulled off
butterfly in the center and sewn it to the neck of the cat.


