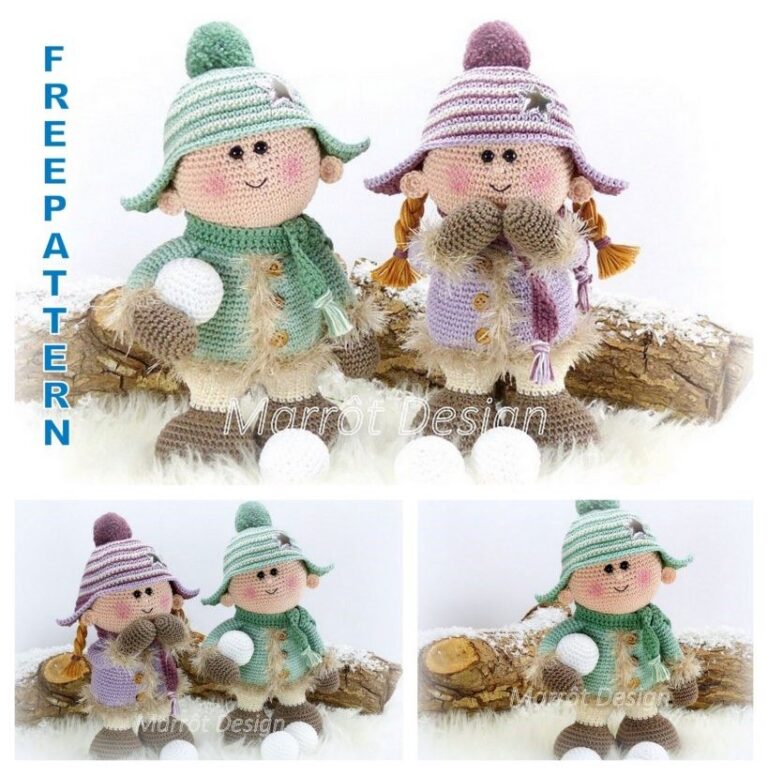
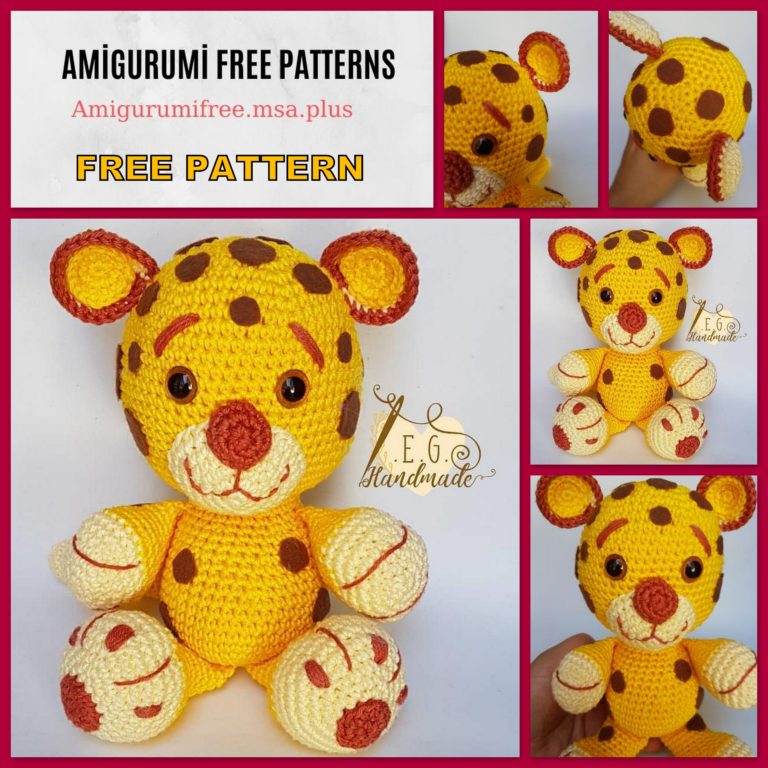
Amigurumi Doll Hariton Brownie Free Crochet Pattern
Pinterest Offical Page : Amigurumfree.msa.plus
Facebook Group: Amigurumi Free Patterns
Facebook Offical Page: Amigurumfree.msa.plus
Welcome to our website where you can find the most beautiful and highest quality samples of Amigurumi patterns. All the amigurumi patterns you can’t find are available on our website. Every day we continue to share new amigurumi patterns for you. Stay tuned to reach these amigurumi patterns before anyone else
Master Class-st “Brownie Hariton”
The height of the house is 33 cm.
Foot length – 10 cm.
Khariton is knitted in one solid figure, only the eyelids, nose and ears are sewn.
Hat, shirt, vest – removable parts, knit separately.
The blast furnace is completely, as well as all its removable parts, crocheted 1.6 mm, outside
depending on the thickness of the yarn!
Abbreviations:
Sc – single crochet,
inc – increase,
Dec – decrease
Hdc – half crochet
ОІNC – back-turn row;
CH – lift loop.
Necessary materials:
1. Alize Diva Yarn:
– Beige (for the body);
– White (for socks and bags);
– Blue (for pants).
2. Yarn Art Tulip Yarn:
– Red (for a shirt).
3. Yarn sock wool:
– beige (for bast shoes);
– brown (for hat and vest).
4. Felting wool is white (for styling hair, beard and eyebrows).
5. Needle for felting.
6. Eyes screw with caps, blue – 2 pcs.
7. Wooden beads (for decorating hats, bast shoes, bags and belts).
8. Large blue beads (for decorating hats and belts).
9. Foamiran butterflies (for decorating hats and brooms).
10. Sewed symbols “Horseshoe”, “Hand” (for decorating hats and vests).
11. Hook 1.6 mm.
12. Scissors, sewing needle, pliers.
13. Thick cardboard (for the sole of the bast shoes).
14. Clay Moment.
15. Filler (holofiber, synthetic winterizer).
16. Copper wire is thick and thin (for arms, neck, broom).
17. Artificial blue flowers – 3 pcs. (to decorate the vest).
18. Bast (for a broom).
19. Decorative button-butterfly (for bag).


Getting to work!
Eyelids (4pcs)
We dial 11 CH, we turn the work, 10 SC.
We knit 4 such segments.
Nose
6 SC into magic ring;
6 inc,
12 SC × 2 times.
Leave a long thread for sewing on the nose.
Ears (2pcs)
6 SC into magic ring;
We turn the work and do 6 inc.
Leave a long thread for sewing.
Hands.
First we knit the fingers.
Big:
8 SC into magic ring
8 SC × 4 rows.
Index, middle, nameless and pinky fit the same way –
6 SC into magic ring
6 SC × 5 rows.
On the little finger we do not cut the thread, but continue knitting:
3 SC on the little finger, 3 SC on the nameless, 3 SC on the middle and 6 SC on the index. Then 3
SC on average, 3 SC on the nameless and 3 SC on the little finger (24);
24 SC;
8 SC, 4 SC simultaneously on the thumb and palm, 12 SC (for the right hand). For
the left fits the other way round – 12 SC, 4 SC simultaneously on the thumb and palm, 8 SC
(24);
8 SC, 4 SC on the thumb, 12 SC (for the right hand), for the left – 12 SC, 4 SC on
thumb, 8 SC (24);
24 SC;
(2 SC, dec) × 6 times (18);
18 SC;
(2 SC, dec) × 4 times, 2 SC (14);
Fill the palm with filler.
14 SC × 25 rows.
We knit the left hand in the same way, given the changes in joining the thumb!
Legs.
We draw a chain of 18 CH, in the 2nd from the hook we knit a loop 2 SC (inc), then we knit 15 SC,
5 SC in the last CH. Next, we knit in a circle, on the opposite side of the chain 15 SC, 2
SC in the last loop (39). This was the first lap.
2nd circle: 2 inc, 15 SC, 5inc, 15 SC, 2 inc (48)
3rd circle 🙁 inc, 1 SC) × 2 times, 15 SC, (inc, 1 SC) × 5 times, 15 SC, (inc, 1 SC) × 2 times (57)
4th circle: (inc, 2 SC) × 2 times, 15 SC, (inc, 2 SC) × 5 times, 15 SC, (inc, 2 SC) × 2 times (66)
5th circle: (inc, 3 SC) × 2 times, 15 SC, (inc, 3 SC) × 5 times, 15 SC, (inc, 3 SC) × 2 times (75)
So we formed the sole of the bast.
Cut out the insole from the cardboard according to the size of the resulting sole and glue it on the wrong side
side of knitting.
Next, set the marker (I use a small length of thread of a different color) and continue
Knit in a circle 75 SC exactly 5 rows. We fix the thread and cut it.
Now we will be engaged in the formation of the front of the bast.
We find the center (middle) in the front of the bast shoe and select exactly 12 loops in this part.
We attach the thread and knit ОІNC.
12 SC × 6 rows.
The result was a “tongue”.
We attach the sides of the “tongue” to the sides of the bast shoes and sew them together.
Our bast shoes are ready!
Next, continue knitting with a white thread. It will be a brownie sock.
We attach the thread to the rear semi-loops of the “tongue”, leave the front ones for decorative
bindings of bast shoes. We have exactly 12 loops there, but since the AlizeDiva thread is slightly thinner than the sock yarn,
at the very beginning of knitting a sock, we need to make a few increases. I am doing 4 increases.
We attach the thread and knit: inc, 3 SC, inc, 3 SC, inc, 2 SC, inc.
A total of 16 loops.
Next, we will knit ОІNC, just as we knitted the tongue of bast shoes.
16 SC × 10 rows.
Now, we apply the side of the sock with the working thread to the side of the bast.
We count 8 loops on the side of the bast shoe from its front, and from the 9th loop, for the back half loops,
knit in a circle.
On the other hand, we also apply our white segment, leave 8 loops not knitted
and finish knitting with 16 loops on the side of the sock.
So we got a vicious circle of 48 SC.
The slots formed from the non-knit loops of the slit we sew back to tone in tone
half loops of bast shoes, as shown in the photo, front leave for decorative trim!
Tightly stuff the bast shoe, trying to evenly distribute the filler.
We make the binding of the bast shoes in a circle, for the half loops left by the usual SL-ST.
We continue to knit a sock.
We make evenly 10 decreases.
(Dec, 3 SC) × 9 times, dec, 1 SC (38)
38 SC × 15 rows.
We tie to the middle of the back of the leg and attach the blue thread.
We do not cut the white thread yet.
For the back half loops we knit the first row of pants.
İnc, 37 SC (39)
Next, we knit for both half loops.
1 SC, inc, 37 SC (40)
2 SC, inc, 37 SC (41)
3 SC, inc, 37 SC (42)
4 SC, inc, 37 SC (43)
4 SC, 2inc, 37 SC (45)
45 SC × 15 rows.
We fix the thread, cut it off.
We return to the white thread.
For the left front half loops, we will knit a sock harness.
I tie with the usual SL-ST.
38 SL-ST.
And so the left leg of the brownie is ready.
We knit the right leg in the same way, but at the end of knitting we do not cut the thread.
We make laces for bast shoes from the same beige wool mixture.
We cut two long identical lengths of thread, about 25-30 cm long.
We decorate both ends of each thread with wooden beads and fix them with knots.
Then we fix the center of each thread to the center of the back of the bast shoe, wrap it in a few turns
around the leg (on a white toe) and tie to 2 knots.
We put both legs in front of us.
Find the middle on the inside of both legs and mark them. Here we will have
connection of legs.
If there are not enough loops to the middle you have planned, then tie them, and vice versa, if
need to dissolve a few, then dissolve.
So, we begin joining the legs.
From the right foot we knit 3 CH, then 45 SC along the left foot, 3 inc we do on one side of the chain of
3 CH, then we knit 45 SC on the right leg and also 3 inc on the second side of the chain of 3 CH
(102)
Knit in a circle 102 SC × 5 rows
(8 SC, dec) × 10 times, 2 SC (92)
(7 SC, dec) × 10 times, 2 SC (82)
(6 SC, dec) × 10 times, 2 SC (72)
72 SC × 5 rows.
Tightly stuff the legs with filler.
We attach the beige thread and we knit 72 SC for the back wall.
Go back to the blue. Behind the front wall we make panties strapping. We knit 72 SL-ST. Blue thread
fasten and trim.
Beige thread continues to knit the body.
72 SC × 19 rows.
We fill the body with filler.
Next, we will tie our hands.
16 SC, 4 SC simultaneously on the left hand and body, 30 SC, 4 SC simultaneously on the right hand and
body, 18 SC (72);
16 SC, 10 SC on the left hand, 30 SC, 10 SC on the right hand, 18 SC (84);
84 SC × 3 rows;
At this stage, you must insert the thick copper wire into the hands of the brownie.
To do this, we spread both hands of the brownie in different directions and measure their total length.
Cut the wire to the desired length and insert into both hands. One end in one hand, the other in
another, and evenly distribute.
If necessary, add filler and continue knitting:
(5 SC, dec) × 12 times (72);
(4 SC, dec) × 12 times (60);
(4 SC, dec) × 10 times (50);
(3 SC, dec) × 10 times (40);
(3 SC, dec) × 8 times (32);
(2 SC, dec) × 8 times (24);
24 SC × 7 rows (neck).
We will continue to knit the house-head after we knit and put on a shirt!
Shirt.
We dial 42 CH (2 CH)
We turn the work. With the 3rd from the hook of the loop we knit 40 HDC, 1 CH, turn the work;
(2 SC, inc) × 13 times, 1 SC, 1 CH, turn (53);
(3 SC, inc) × 13 times, 1 SC, 1 CH, turn (66);
11 SC, 11 CH, 11 SC skip, 22 SC, 11 CH, 11 SC skip, 11 SC, 1 CH, turn (66);
66 SC × 3 OİNC.
Next, knit in a circle HDC.
66 HDC × 13 rows;
(2 HDC, inc) × 22 times (88);
(3 HDC, inc) × 22 times (110);
110 HDC × 4 rows;
Crawling step.
Next, we knit the sleeves. We attach the thread to the center of the inner side of the sleeve and type in
circle 24 HDC;
24 HDC × 15 rows;
Crawling step.
With a gait step, we also tie the neck and neckline of the front of the shirt.
With a small piece of white thread we do the lacing on the chest of the brownie.
Our shirt is ready!
Dress her up and knit her head to Hariton.
(3 SC, inc) × 6 times (30);
(4 SC, inc) × 6 times (36);
(5 SC, inc) × 6 times (42);
(6SC, inc) × 6 times (48);
(7SC, inc) × 6 times (54);
(8 SC, inc) × 6 times (60);
(9 SC, inc) × 6 times (66);
(10 SC, inc) × 6 times (72);
(11 SC, inc) × 6 times (78);
(12 SC, inc) × 6 times (84);
(13 SC, inc) × 6 times (90);
(14 SC, inc) × 6 times (96);
(15 SC, inc) × 6 times (102);
102 SC × 10 rows;
38SC, 3 CH, 3 SC skip, 10 SC, 3 CH, 3 SC skip, 48 SC (102);
102 SC × 10 rows.
We insert eyes. Sew eyelids, nose (add a little filler to the nose), ears. In the neck for
stability insert wire and add filler.
Gradually fill our heads.
We continue knitting:
(15 SC, dec) × 6 times;
(14 SC, dec) × 6 times;
(13 SC, dec) × 6 times;
(12 SC, dec) × 6 times;
(11 SC, dec) × 6 times;
(10SC, dec) × 6 times;
(9 SC, dec) × 6 times;
(8 SC, dec) × 6 times;
(7 SC, dec) × 6 times;
(6 SC, un) × 6 times;
(5 SC, dec) × 6 times;
(4 SC, dec) × 6 times;
(3 SC, dec) × 6 times;
(2 SC, dec) × 6 times;
(1 SC, dec) × 6 times;
6 dec.
We fix the thread, cut it and hide it.
Now we’ll take care of hair, beard and eyebrow styling based on photos.
Hat.
6 SC into magic ring;
6 inc (12);
(1 SC, inc) × 6 times (18);
(2 SC, inc) × 6 times (24);
(3 SC, inc) × 6 times (30);
(4 SC, inc) × 6 times (36);
(5 SC, inc) × 6 times (42);
(6 SC, inc) × 6 times (48);
(7 SC, inc) × 6 times (54);
(8 SC, inc) × 6 times (60);
(9 SC, inc) × 6 times (66);
For the rear half loops we knit 66 SC;
66 SC × 4 rows;
(10 SC, inc) × 6 times (72);
(11 SC, inc) × 6 times (78);
(12 SC, inc) × 6 times (84);
(13 SC, inc) × 6 times (90);
(14 SC, inc) × 6 times (96);
Crawling step.
The hat is ready and you can do its decoration!
Sew foamiran butterflies, wooden beads, beads and a horseshoe (see photo). All
sew the details with the same thread that knitted the hat!
Vest.
Our vest will be knitted by OİNC, so at the beginning of each row you will need to make loops
lift (CH), 2 CH if the row fits HDC, and 1 CH if we knit SC!
We dial 26 CH (2 CH);
With the 3rd from the hook, we knit 24 HDC;
(3 HDC, inc) × 5 times, 4 HDC (29);
(4 HDC, inc) × 5 times, 4 HDC (34);
(5 HDC, inc) × 5 times, 4 HDC (39);
13CH, 12 loop through, 13 SC, 13 CH, 12 loops through, 1 SC (39);
39 HDC;
39 SC;
39 HDC;
39 SC;
39 HDC;
39 SC;
39 HDC;
39 SC;
39 HDC.
We fix the thread, cut it off.
We attach the thread to the beginning of the left shelf, make 2 CH, and begin to tie the HDC vest.
We tie the left shelf, the bottom of the back, go up the right shelf.
Do not tie neckline!
We tied the loops of the right shelf, turn the knitting, do 2 CH, and continue to tie
in the opposite direction. We tie the loops of the left shelf, once again we turn the work
make 2 CH, and knit HDC again to the end of the right shelf.
Thus, we made 3 semicircles of ОІNC strapping, thereby extending the vest a little more and
formed it in front (shelves, left and right).
We fix the thread, cut it and hide it.
Our vest is ready!
We pin the flowers to the right shelf of the vest and a little lower we sew the amulet “Hand”.
Belt.
Using beige wool mixture, we draw a chain of 55 CH.
Leave a long tail at the very beginning of the loop set. On this thread we will string
beads and beads!
Scored a chain, also leave a long tail, cut the thread.
We attach the brown wool mixture (also do not forget to leave long on both sides
threads) and knit 55 SC. We cut the thread.
We attach the white thread and knit 55 SC (do not forget to leave long tails on both
parties).
The belt is ready!
On the left ponytails we string wooden beads and beads. At the ends of the threads we do
thick nodules so that the beads do not fall.
A bag.
Our bag will be knitted by OİNC, so at the beginning of each row we make 1 CH!
We collect a chain of 16 CH (1 CH).
15 SC × 10 rows;
15 SC we knit for the back walls;
15 SC we knit for the front walls;
15 SC × 10 rows.
The resulting rectangle is bent in half (the place where we knitted for the front and rear
walls should be inside).
Beige wool blend the sides of the SC bag, as shown in the photo.
Turn out the bag.
Sew on the butterfly button.
With beige wool mixture, we collect a chain of 60 CH.
The bag belt turned out.
Long threads should remain on both sides of the chain, for which you must carefully
attach the belt to the bag.
We do not cut the threads, string on each of them 1 wooden bead and fix them
knots.
Then cut off 7 small pieces of beige wool mixture and tie them evenly to the bottom
bags on the front side (where there were unknotted half loops left).
Our bag is ready!
Broom.
The bast is a kind of artificial straw.
Choose the required number of “straws” of the same length.
Our broom will turn out to be 15 cm high, so the length of each “straw” should be
about 30 cm
The more you collect, the better. It should get a good bunch.
We bend it in half and wrap it with thin wire just above the middle. Stab on
wire foamiran butterfly, firmly fasten the end of the wire and hide it.
The broom is ready!
Here we have such a wonderful Hariton!
For each of you, he will certainly bring good luck and prosperity, because the things done by his
hands endowed with magic!