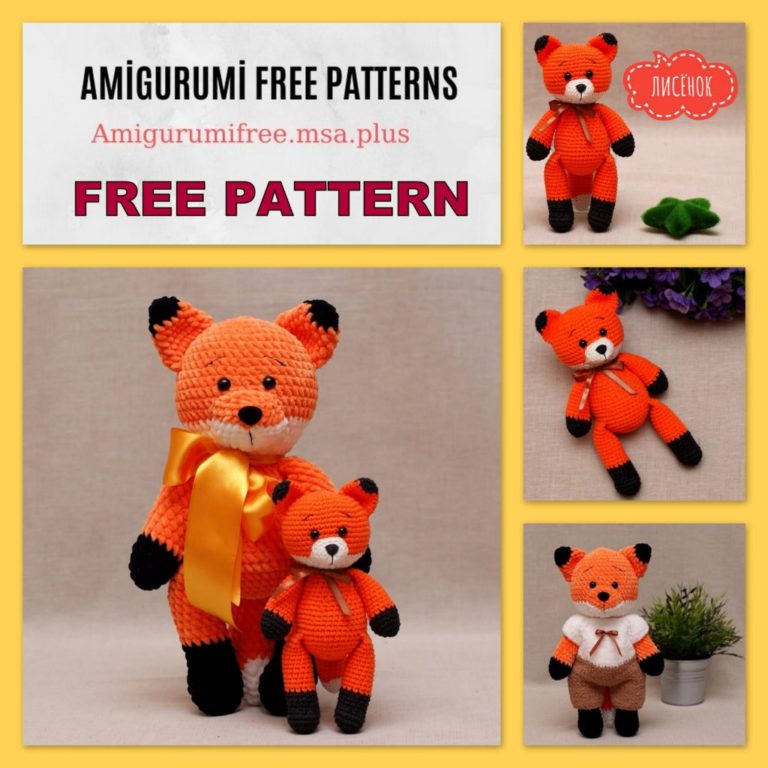
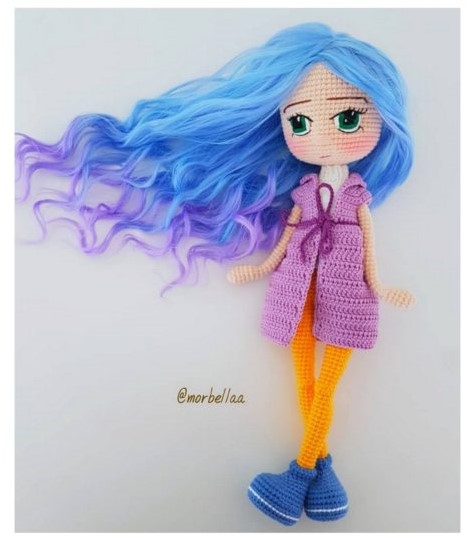
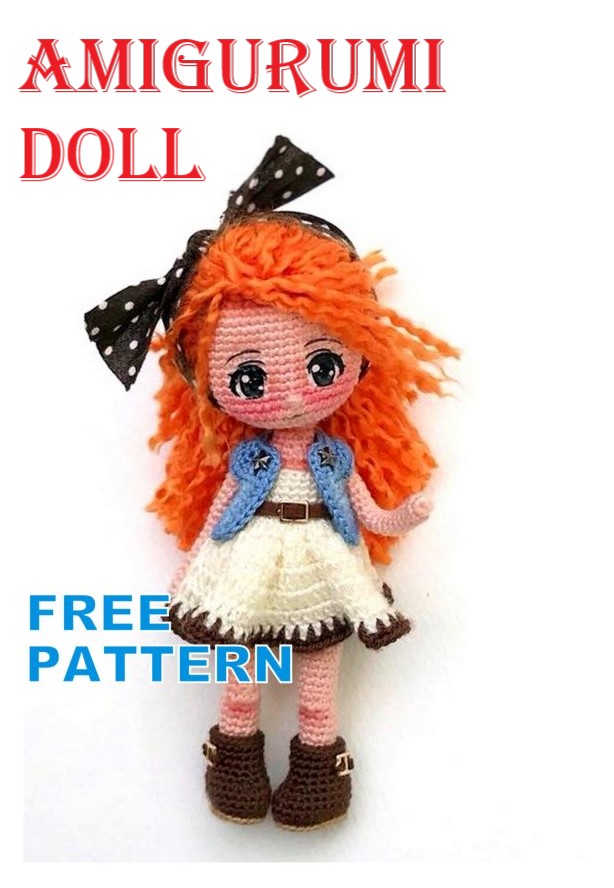
Amigurumi Doll Girl in Hat Free Crochet Pattern
Pinterest Offical Page : Amigurumfree.msa.plus
Facebook Group: Amigurumi Free Patterns
Facebook Offical Page: Amigurumfree.msa.plus
In this article I will share with you amigurumi girl in hat free crochet pattern. We always keep you up-to-date with Amigurumi.
TERMS USED
CH – chain
SC – single crochet;
İNC – increase
DEC – decrease
DC – double crochet;
PATTERN


Body, you must make 1 with 2.25 mm crochet, spiral technique. It starts from below
upwards. Do not forget to fill in the body as you go along.
Rda 1: Start with lead color making magic ring, then ride 6 sc points
(sc). You will finish the round with 6 points.
Round 2: Make 1 increase for each point of the previous round. You will finish the round with 12
sc points.
Round 3: Knit * 1 sc, 1 inc * repeat 6 times. You will finish the round with 18 points.
Round 4: Knit * 2 sc, 1 inc * repeat 6 times. You will finish the round with 24 sc points.
Round 5: Knit 1 sc, 1 inc. Then * 3 sc, 1 inc * repeat 5 times and finish the round with 2 sc.
The final point count will be 30 pts.
Rda 6: You will do * 4 sc, 1 inc * repeat this sequence 6 times. You will finish the round with 36 pts.
Rda 7: Make 2 sc, 1 inc. Then repeat the sequence * 5 sc, 1 inc * 5 times, finish the
Round with 3 sc points. Final point count will be 42 pts.
Rda 8: Crochet * 6 sc and 1 inc * repeat the sequence 6 times. It will end with 48 sc point the
round.
Rounds 9 to 14: Maintain 48 sc points.
Rda 15: You will change the color, knit the back buclé with light pink or pastel color
keeping 48 sc points.
Rounds 16 to 24: You must keep the 48 sc points for 9 rounds.
Rda 25: Make * 6 sc points, 1 dec * repeat the sequence 6 times. You will finish with 42
points.
Rda 26: Maintain the 42 sc points.
Rda 27: Make * 5 sc points and 1 dec * repeat sequence 6 times. End the round with
36 pts
Rda 28: Maintain the 36 sc points.
Round 29: Make * 4 sc points and 1 dec * repeat 6 times sequence. Finish round with 30
points.
Rda 30: Maintain 30sc points.
Rda 31: Make * 3 sc points, 1 dec * repeating this sequence 6 times. Final countdown
of points 24.
Rda 32: Maintain 24 sc points.
Rda 33: Make * 2 sc points, 1 dec * repeat sequence 6 times. Finish with 18 points.
Rda 34: Maintain the 18 sc points.
Rda 35: Make color change to damask, knit through the back bucket of round 34.
Make 18 sc points.
Rounds 36 to 40: Maintain the 18 sc points.
Rda 41: Knit * 1 sc, 1 dec * repeat this sequence 6 times. You will finish the round with 12
sc points.
Rda 42: Make 1 dec in each of the points. You will finish with 6 sc points. Do
needle closure
Head: Make 1, 2.25 mm crochet, damask color. Spiral technique
Rda 1: With damask color make 7 sc points in a magic ring.
Round 2: Make 1 increase for each point of the previous round. You will finish the round with 14
sc points.
Round 3: Knit * 1 sc, 1 inc * repeat 7 times. You will finish the round with 21 points.
Round 4: Knit * 2 sc, 1 inc * repeat 7 times. You will finish the round with 28 sc points.
Round 5: Knit 1 sc, 1 inc. Then * 3 sc, 1 inc * repeat 6 times and finish the round with 2 sc.
The final point count will be 35 pts.
Rda 6: You will do * 4 sc, 1 inc * repeat this sequence 7 times. You will finish the round with 42 pts.
Rda 7: Make 2 sc, 1 inc. Then repeat the sequence * 5 sc, 1 inc * 6 times, finish the
Round with 3 sc points. Final point count will be 49 pts.
Rda 8: Knit * 6 sc and 1 inc * repeat the sequence 7 times. It will end with 56 sc point the
round.
Rounds 9 to 19: Keep the amount of 56 points. Put safety eyes between the round
12 and 13 with 6 points of separation.
Round 20: Do * 6 sc and 1 dec * repeat the sequence 7 times. It will end with 49 sc point
round.
Rda 21: Make 2 sc, 1 dec. Then repeat the sequence * 5 sc, 1 dec * 6 times, finish the
Round with 3 sc points. Final count 42 points.
Rda 22: You will do * 4 sc, 1 dec * repeat this sequence 7 times. You will finish the round with 35
pts
Round 23: Knit 1 sc, 1 dec Then * 3 sc, 1 dec * repeat 6 times and finish the round with 2 sc. The final point count will be 28 pts.
Round 24: Knit * 2 sc, 1 inc * repeat 7 times. Final count 21 points.
Arms. You must make 2 with damask color. You will start from hand to shoulder.
Rda 1: Start with magic ring and ride 6 sc.
Round 2: Make 1 increase at each point of the previous round. You will finish with 12 sc
points.
Rounds 3 and 4: Maintain the 12 sc points.
Rda 5: Make 9 sc points, then make 1 puff point of 4 half double crochet and finish with
2 sc points. Final point count is 12.
Rda 6: Make 8sc 1 dec, 2 sc. Final count 11 points.
Rounds 7 to 20: Keep all 11 points for 14 rounds. Knit slipped in the following
point and cut.
Light blue sleeves
Round 1: Start 15 chains and then join them with a sliding point. Be careful that
the chain is not crooked. You must do 2 sc and 1 increase, repeating this
sequence. You will finally have 5 increases in total. Final count 20 points.
Rounds 2 to 9: For 8 rounds you must keep the amount of 20 points.
Rda 10, Make 1 decinution in each of the points of the previous round. Final countdown
10 pts It joins with the arm keeping the points, it declines in all, close with
needle.
Wig
Rda 1: With pastel yellow make 7 sc stitches in a magic ring.
Round 2: Make 1 increase for each point of the previous round. You will finish the round with 14
sc points.
Round 3: Knit * 1 sc, 1 inc * repeat 7 times. You will finish the round with 21 points.
Round 4: Knit * 2 sc, 1 inc * repeat 7 times. You will finish the round with 28 sc points.
Round 5: Knit 1 sc, 1 inc. Then * 3 sc, 1 inc * repeat 6 times and finish the round with 2 sc.
The final point count will be 35 pts.
Rda 6: You will do * 4 sc, 1 inc * repeat this sequence 7 times. You will finish the round with 42 pts.
Rda 7: Make 2 sc, 1 inc. Then repeat the sequence * 5 sc, 1 inc * 6 times, finish the
Round with 3 sc points. Final point count will be 49 pts.
Rda 8: Knit * 6 sc and 1 inc * repeat the sequence 7 times. It will end with 56 sc point the
round.
Rounds 9 to 17: Maintain the 56 sc points for 9 rounds.
Wicks
Then you will start knitting the wicks. First you will make 21 wicks, using to
this 42 points from the edge of the wig. You will have to knit for the frontloop of round 8,
making 30 cad, knit the first half stitch in the second chain from the crochet, to
then make 1 inc. Repeat sequence of * 2 sc and 1 increase of half a point * 9
times. Once you reach the base of the hair you should skip 1 point of the edge of the helmet and
in the next one make 1 slipped point. So then you must repeat what is described for each
wick.
Once you finish making the 21 long wicks you should make the click. These are
in total 13 wicks. Here it will be different, since you should not skip points at the end of
wicks
Run this sequence for each wick of the click: 3 chains, you become
working 3 slipped points on each of the 3 chain stitches you just made,
then anchor with sliding point at the next point. So run 12 more wicks
Shoes:
You will have to do 2. We will start weaving the sole with pastel pink color. You will make 4 pieces
same as those that must be superimposed and joined with a sliding point or satin. Occupy crochet
2.25 mm Circular technique
Row 1: Start with 9 chains, then make 1 half double crochet (hdc) in the fourth chain
from the crochet, 4 hdc, at the last chain point make 5 hdc. You will be working
in the lower part of the chain. Do 5hdc and finish with 4 hdc at the last point
available before the start, close with sliding point in the second chain of height. (twenty
pts)
Row 2: Upload with 2 chains, then make 5 hdc, in the next 5 points you must do
1 increase of hdc for each of them, 5 hdc and finish with 4 increases of hdc in the
next 4 points and 1 hdc at the base of the 2 cad height of the beginning. Close with pto
slipped into the second chain of the beginning. (30 pts)
Row 3: Climb with 2 chain, then make 6 half double crochet, one for each of the Next 6 points. Do next sequence * inc of hdc, 1 hdc * repeat 5 times, then
make 5 hdc, * 1 inc, 1 hdc * 4 times, 1 hdc at the base of the 2 beginning chains, close
with slip point in the second chain. (40 pts)
Extra Rda: you must make a round with dwarf or satin ptos taking the back buclé
of the points in round 3. I suggest you use a slightly larger crochet or have
Be careful to knit loose enough so that the contour of your fabric does not shrink
sole.
Cut a piece of cardboard to put between the soles, this way they will have greater
Firm the shoes. Notice that both soles are located with the right towards you in
the photo. You will have to put them down to join them, using for this the back buclé of
the round of satin dots on the sole 1, with the front buccoli of the round of dots on
the sole 2. Join with slip or satin and fuchsia color. Putting the sole 1 down
anchor at the back of the sole (marked with an asterisk in photo 1). Don’t forget about
Knit loose or use a larger crochet. Once you have finished the round, cut the strand
and close with a needle. For more details see photographs.
Once joined both soles you will begin to weave the body of the shoe using fuchsia color.
Locate the back of the sole (marked with an asterisk). Remember that now you will be
working with the sole on the reverse side.
Rda 1: Take only the back loops of the round of single points (color
fuchsia) and knit 40 sc stitches.
Rounds 2 to 5: Maintain 40 sc points.
Rda 6: 11 sc, * 1 dec, 1 sc * repeat this sequence 6 times, 11 sc points. 34 pts
Rda 7: 11 sc, * dec hdc, 1 hdc * 3 times and end with 1 dec of hdc, 12 sc. 30 pts
Rda 8: Maintain the previous points with sc the 30 points
Rda 9: 10 sc, 5 dec of hdc, 10 sc. 25 points
Rda 10 and 11: keep sc above points. 25 points
Here the Odette panty will begin to be knitted by the back buclé using dark gray.
Rda 12: Knit 6 sc stitches, 7 dec of hdc, 5 sc stitches. You will finish with 18 points the
round. Fill the shoe.
Rounds 13 to 15: Keep the 18 sc points. At the last point of round 18 you must
Make color change to light gray.
From now on we will make the design of the panty using 2 gray colors (clear and
Dark).
Rda 19: This round you will work with light gray. You must make 1 half point, and then 1
half a point anchored in round 17. So you must do the entire round 19, interspersing the
sequence. At the last point of the round make color change to dark gray.
Rda 20 and 21: Maintain the 18 sc points.
Repeat the previous sequence (rda 19, rda 20 and 21) until you reach round 40. In the last
Round 40 point make color change to dark gray. You must fill in the leg
as you weave
Round 41: Make * 1 half point 1 dec * repeat the sequence 6 times, you will end with 12
points.
Rda 42: Make 1 dec at each point, you will end up with 6 points. Make needle closure. Leave
long strand to join.
Laces. In dark gray you must make 4 for each shoe, counting from the bottom
upwards. And ceded.
First cord: 12 chains, place it between round 5 and 6 of the fuchsia fabric of the shoe.
Second cord: 11 chains. Place it between round 7 and 8.
Third cord: 8 chains. Rounds 9 and 10.
Fourth cord. 7 chains. Rounds 11 and 12.
Furry edge of the shoe. Cut a strand of stuffed animal long enough to
encompass the total outline of the shoe shank. With the help of a needle you must fix
1 end of the strand to the back of the boot’s boot edge, then surround the
boot rod and return to the same starting point to re-anchor the strand.
Leg posture
Dress: You will have to knit 1 in a predominantly light blue color and 6 triangles below
They describe.
Triangle:
Rda 1: With fuchsia color. Mount 12 half double crochet in a magic ring. Don’t close the
magic ring since in round 2 you must knit inside. Remember that the first point will be
2 chains. Close with a sliding point in the second chain of the beginning.
Rda 2: Light pink color. Anchor at any point in round 1 and come up with 1 chain.
This point is not counted as a point, then you must make 1 half point but you must
take it out from the center of the magic ring. Again make 1 chain, so you will have 6
sc points that leave from the center of the magic ring, and 6 chains of separation.
Close with slip stitch.
Rda 3: With pink color, you must work within the space of 1 chain. In that
space you will have to knit 4 half double crochet, then make a satin stitch in the half stitch. So
Repeat sequence You will get a total of 6 petals. Close with sliding point.
Round 4: With green color, anchor at the slipped point or satin point you made in the round
3, make 3 chain, make 1 half point at the slipped point of round 3, you must
knit this half stitch around round 3. This way you will get 6 lines that will be projected
from each of the sc points of round 3, plus 6 bows of 3 chains.
Rda 5: With water green color, you must anchor at any half point of round 4,
climb with 3 chains and then make 1 double crochet in the same base, start knitting now in the
next space of 3 chains and knit 3 half double crochet, 1 half double crochet in the middle
point, then in the next space of 3 chains make 3 half double crochet, now you will
one corner, you must do it in the next half point, make [2 double crochet, 2 chains and
2 double crochet], 3 half double crochet in the next space of 3 chains, then 1 half double crochet
in the midpoint of round 4, in the next space of 3 chains make 3 socks
double crochet, then make another corner again [2 double crochet, 2 chain and 2 double crochet], 3
half double crochet in the next space of 3 chains, half double crochet in the middle point, 3
half double crochet in the space of 3 chains and finish the round with [2 double crochet, 2
chains] close with a sliding point on the third chain at the beginning.
Rda 6: With light blue color, you will anchor in the space of 2 chains of a corner and you will climb
with 3 chains, then make 2 double crochet in the same space of 2 chains, to
then you must make 1 double crochet for each point on the side of the triangle, you must have
11 double crochet, then in the next corner you must make 3 double crochet, 1 chain and 3 double crochet.
Union of the triangles: With light pink and crochet color 2,25 mm. Copy the pattern from
distribution of the image below and make the connection with satin point taking only the loops
central of each triangle. Start where the asterisk is. Once you join 5 sides
keep making slipped points to join the side indicated by an arrow and the side
That is with an orange line. This will make you have a cylinder. View image.
Referential image for union
Then you must knit a round of sc stitches and pineapple stitches of 4 double crochet
light pink. This round will mark the top of the dress.
Execution: You must anchor with a light pink color on the first double crochet of the triangle (see
image), then make 17 sc points. Once this sequence is finished make 1 point
pineapple with 4 double crooks anchored in the ceiling located above the 2 chains of
corner of the triangle with its tip up. Then do again 17
sc points. Repeat this sequence all around.
Round 1: With light blue color make 2 height, 15 half double crochet, pineapple point of 3 half
double crochet (leaving 3 different points of the base) 15 half double crochet, pineapple point of 3
half double crochet (leaving 3 different points of the base, 15 half double crochet, pineapple point of
2 half double crochet (taking the remaining 2 points). Close with slip stitch point on the
Second chain of the beginning.
Rda 2: Climb with 2 chains, 12 half double crochet, pineapple point of 3 half double crochet (leaving
of 3 different points of the base), 12 half double crochet, pineapple point of 3 half double crochet
(leaving 3 different points from the base), 12 half double crochet, 2 half pineapple point
double crochet (leaving 2 different points of the base) and close with a sliding point on the
Second chain of height of the beginning. 39 points
Rda 3: Climb with 2 chains, 11 half double crochet, pineapple point of 3 half double crochet (leaving
of 3 different points of the base), 11 half double crochet, pineapple point of 3 half double crochet
(leaving 3 different points from the base), 11 half double crochet, 2 half pineapple point
double crochet (leaving 2 different points of the base) and close with a sliding point on the
Second chain of height of the beginning. 36 points
Round 4: Climb with 2 chains then make 1 half double crochet, 1 dec half double crochet, * 2
half double crochet, 1 dec half double crochet * repeat 8 times. Close with slip point on the
Second chain. 27 points
Rda 5: 2 tall, 2 half double crochet and 1 dec half double crochet, then make * 3 half
double crochet, 1 dec * repeat 4 times and finish with 1 half double crochet. Close with slip stitch
in the second high chain and cut the strand. Final count 21 points.
Round 6: Anchor with white at the slipped point of round 5 and come up with 1
high chain, then make 1 half point for each of the following 20. Close
with slip point.
Extra Rda: Make plain or slipped points throughout the round.
Dress lapel
Step 1: Anchor in the eighth half-crochet point of the central triangle and make 8 points
satin, covering up to round 5 of the dress. Cut and secure the strand. View image.
Step 2: Anchor at the first ceiling corresponding to the beginning of arrow 2, go up with 2
chain, then make 7 double crochet, close and cut the strand. Mount 2 buttons as indicated
the picture.
Bottom edge of the dress.
Rda 1: Work with light pink color. Anchor in triangle corner, make sure you are
on the back of your dress. Come up with 2 chains, then do 17 double crochet for each
triangle side, when you reach the corner make 1 double crochet, and at the tip of the triangle
Invested make 2 double crochet, but separate, not as increase. View image. Close with
slip point in the second chain of the beginning.
Rda 2: Change to fuchsia color. Anchor at the back and climb with 1 chain, make
Fan point of 4 double crochet on the next point, skip 1 point. * 1 sc, skip 1 point,
4 double crochet fan, skip 1 point * repeat 15 times. Close with slip point on the
chain of height of the beginning.
Cap: You must make 1 occupying white and light pink, plus stuffed animal. The
details will be made in lead and fuchsia color.
Rda 1: Start with magic ring, make 2 chains and then 11 half double crochet. Close with
slip point on the second chain.
Round 2: Make 1 increase of half double crochet for each point, final count will be 24 averages
double crochet
Rda 3: Make * 1 half double crochet, 1 inc of hdc * repeat all around. 36 points
Rda 4: Make * 2 half double crochet, 1 inc of hdc * repeat all around. 48 points
Rda 5 to 12: Keep the 48 half double crochet.
Earmuffs
You should center the height line at the rear.
The first earmuff will start from the seventh point, anchors with white color and you climb with 2
chains, then make 9 half double crochet, rotate tissue.
Rda 2: knit without height, make 6 half double crochet and 1 dec of hdc. Turn tissue.
Rda 3: knit without height, make 4 half double crochet and 1 dec of hdc. Turn tissue.
Rda 4: knit without height, make 2 half double crochet and 1 dec of hdc. Close.
The second earmuff must anchor it from point 32 and repeat the instructions for
earmuff 1.
Cap edge: With pastel pink, make 1 half point for every half point per
all the contour, start at the back of the hat. On the tip of each earmuff make 2
increases by half a point.
Add the stuffed yarn as follows. Put the yarn inside your hat,
put the crochet on the point and take a loop, pull the spinning buclé to your side (visible)
of peliche and begins to weave satin stitches. You must make 1 point slipped or satin by
each point of round 1 of the hat. Then in round 2, 3 and 4 of the hat you must make 1
satin in the middle, try to knit loose so that the hat does not lose its shape.
Snout
Round 1: With pink color make 1 magic ring and assemble 6 sc points.
Rda 2: Do. Half point for each point.
Round 3: Make * 1 sc and 1 inc * repeat 6 times.
Rda 4: Make 1 half point around the contour, close with a sliding point.
Sew the hat centered and then embroider the nose as seen in the image. The
eyes should be embroidered with extended U-shaped lead color with 4 tabs on the side
low. See image for reference.
Flower: Make 13 chains and in the second chain make 4 half double crochet, in the next
point make satin point, and repeat sequence. You must finish with 6 petals. Leave strand
long, screw the flower itself and sew it with the long strand and attach it to the base of the ear
right of the hat
Ears. Make 2 with white color.
Rda 1: Make 1 magic ring and mount 6 sc points.
Rda 2: Keep the 6 sc points.
Round 3: Make 1 increase for each point of the previous round. You will finish with 12 sc
points.
Rounds 4 to 10: Keep the 12 sc points. Close with slip stitch and leave a strand long to join at the top of the hat. Take image as a reference to locate them.
Hat Band Aid. Do 2.
Cut 5 white strands of 70 cm and twist them until it begins to bend. Then
fold it in half and it will roll itself. Do not release the ends, secure them with
a knot The twisted strand is secured. On the other end of the crooked cord that doesn’t
It has the knot, Mount this strip as the fringes are mounted.
Congratulations, you just finished the beautiful Odette !!!
You can make this doll using the original Tutitas Weaving pattern for sale in small quantities and
always putting our design authorship. Modifying the pattern and changing the name of the
doll.