Amigurumi Doll Summer Girl Free Crochet Pattern
Pinterest Offical Page : Amigurumfree.msa.plus
Facebook Group: Amigurumi Free Patterns
Facebook Offical Page: Amigurumfree.msa.plus
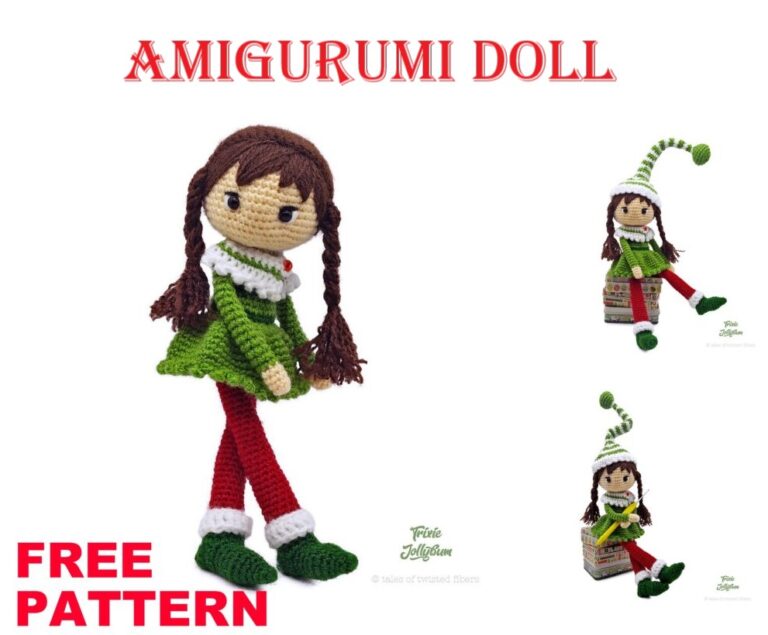
Amigurumi doll summer girl is waiting for you in amigurumi crochet toy free pattern. Everything you are looking for amigurumi on this site.
abbreviations
Mr: Magic ring
SC: Single crochet
İnc: increase
Dec: Decrease
Dc: Double crochet
Hdc: Half double crochet
sl-st: Slip stitch
PATTERN
ARMS:
1. Magic ring into 5sc
2. 5inc = 10sc
3rd and 21st places = 10sc
• 22. Let’s combine the two ends of the arm with 3sc, leave the rope long to sew.
• I did not fill the arms with fiber, but you can fill them if you want.
LEGS:
1. Magic ring into 6sc
2. 6inc = 12sc
3rd and 25th places = 12sc
• After knitting the second leg in the same way, pull the 4 chains and connect them with the other leg.
BODY:
1. 12sc from one leg, 4sc from one lobe of the chain, 12sc from the other leg, 4sc from the other lobe of the chain = 32sc (let’s put the loop identifier here)
2. 5sc, 1inc, 15sc, 1inc, 10sc = 34sc
3. 34sc
4. 34sc
5. 34sc
6. 34sc
7. 34sc
8. 5sc, 1dec, 15sc, 1dec, 10sc = 32sc
9. 32sc
10. 32sc
11. 5sc, 1dec, 14sc, 1dec, 9sc = 30sc
12. 30sc
13. 30sc
14. 30sc
15. 30sc
16. (8sc, 1dec) * 3 = 27sc
17. 27sc
18. (7sc, 1dec) * 3 = 24sc
19. 24sc
20. 24sc
21. 24sc
22. (6sc, 1dec) * 3 = 21sc
23. 21sc
24. 21sc (arms will stand in this row)
25. (5sc, 1dec) * 3 = 18sc
26. (1sc, 1dec) * 6 = 12sc
Rows 27 and 28 = 12sc (Let’s cut the rope long to sew.)
HEAD:
1.Magic ring into 6sc
2.6inc = 12sc
3. (1sc, 1inc) * 6 = 18sc
4. (2sc, 1inc) * 6 = 24sc
5. (3sc, 1inc) * 6 = 30sc
6. (4sc, 1inc) * 6 = 36sc
7. (5sc, 1inc) * 6 = 42sc
8. (6sc, 1inc) * 6 = 48sc
9th and 17th places = 48sc
18. (6sc, 1dec) * 6 = 42sc
19. (5sc, 1dec) * 6 = 36sc
20. (4sc, 1dec) * 6 = 30sc
21. (3sc, 1dec) * 6 = 24sc
22. (2sc, 1inc) * 6 = 18sc
23. (1sc, 1dec) * 6 = 12sc (Let’s cut and hide the rope)
• The eyes are processed between rows 14 and 15 with 5sc between them. If you want, you can also put a locked eye between the same rows so that there is 7sc between them.
• Treat the nose between the 15th and 16th rows with a skin-colored rope.
• Attach the hair to each loop in 3 rows from the top. Insert 5 rows down the sides, it will look like an ear line. 5. Ordinary then you can wear hair on the back of the head, so that there is no space behind.
DRESS:
1. 30ch. Let’s make 22hdc from chain 22. Let’s pull 1ch and go back
2. In FLO, pull 4sc, 7ch and skip 3sc, 8sc, skip 7ch and skip 3sc, 4sc = 16sc, 2ch check back
3. 4hdc as BLO, 7hdc from chain, 8hdc from chain, 7hdc from chain, 4hdc = 30hdc, 3ch check back
4. In FLO = 30dc, 1ch check back
5. 30sc as BLO (We are not going back, let’s connect two ends and make sl-st to the first loop, pull 3ch and continue the same loop)
6. 30dc, sl-st 3ch check
7. (4dc, 1inc) * 6 = 36dc, make sl-st 3ch
8. (5dc, 1inc) * 6 = 42dc, make sl-st 3ch
9. (6dc, 1inc) * 6 = 48dc, make sl-st 3ch
10. 48DC, SL-ST make 3CH
11. (7dc, 1inc) * 6 = 54dc, sl-st 3ch
12. 54dc
13. 54dc
14. Pull 3ch for the tip of the skirt and do the sl-st on the next loop, continue until the end of the row in the form of 3ch, sl-st.
• 8 of the 30 chains we will pull at the beginning will be buttonhole for the button.
ROSES:
1. Let’s shoot 12ch.
2. Let’s make 4 hdc into the 3rd chain, make sl-st to the next chain and make 4hdc into the next chain and go to the end of the chain.
3. When finished, let’s give a rose shape around and decorate the hair with these roses.


